As we know that XAVC is a 4K video format that features high resolution, high bitrates, wide color gamut, top level of compression standard, etc. This format is aimed to put 4K videos into use in civilian market, like the 4K TV programs, 4K advertisement, or 4K documentaries etc. However, so far only 14 manufacturers products including Avid, FCP X, Sony Vegas Pro 12, Quantel, and so on can support this new format. In this way, if you want to play back the XAVC files on mobile devices like iPad, Galaxy Note, BlackBerry, Apple TV, Xbox, etc. you got to make a conversion for your XAVC files, if you want things to be easier.
Then what to use and how to use so as to save your time, money, and the high quality of the videos? Here, iOrgSoft XAVC Video Converter is really the best choice for you. Yes, this software is totally support XAVC format. You can import your XAVC files to it, and set the output format, and then wait for several minutes, you can play back the wonderful videos on your mobile devices with ease!
Tip: above is the Windows version, and the Mac user please try the Mac version of the XAVC Video Converter Mac.
In addition, you can convert your XAVC files to different software for better editing or playback as well, like to convert XAVC to Final Cut Pro (the former version of FCP is not support XAVC), Sony Vegas (the same as FCP), Windows Media Player, QuickTime, etc.
Then I’m going to show you the specific steps for you to try the video converter easily:
Step 1. Download the XAVC Video Converter
At the very beginning, just free download the program by clicking the download link above. After that, you’d better install and run the conversion to get ready.
Step 2. Add files to the converter
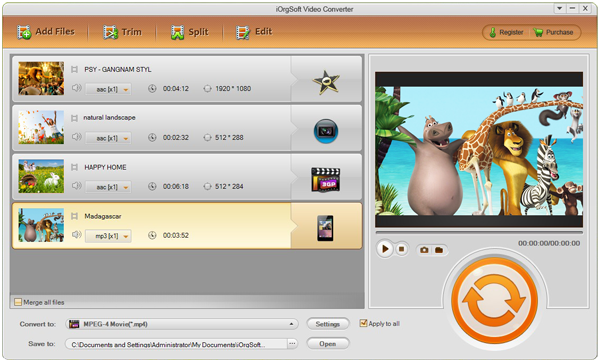
In this step, you should import the XAVC files by striking the “Add File”. Then choose all the videos you want to convert. More, you are allowed to convert all of your videos at a time as the batch converting function is available.
Step 3. Pick out the certain output format
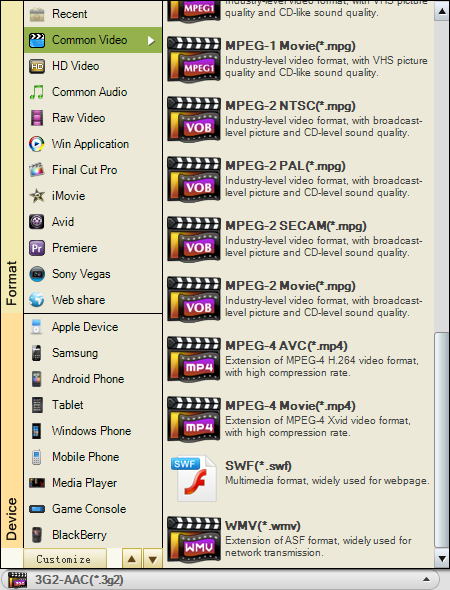
When you click to the “Convert to” bar, you’ll see there are mainly two parts of the profile column, upper part is the programs, lower part is the devices. You can choose the output format according to the specific name of the devices, such “Apple Device”-> “iPad mini HD (*.mp4)”, or you can just go to “Common Video”-> “MPEG-4 Movie(*.mp4)” as MP4 is the widest supported video formats.
Step 4. Get start the conversion
Finally, run the conversion by just clicking the big round and orange button on the right side. When the conversion is finished, go and find your processed files by striking the “Open” button beside the “Convert” icon.


